
192.168.1.1 – 192.168.l.1
192.168.1.1 is a private IPv4 address designated for local area networks (LANs). It serves as the default gateway for routers from brands like Linksys, D-Link, Asus, and Netgear, allowing users to access their router’s admin panel.
Why 192.168.I.1? A Historical and Technical Perspective
The Origins of Private IP Ranges
The 192.168.x.x block (including 192.168.1.1) was reserved by the Internet Engineering Task Force (IETF) in 1994 for private networks. This range ensures devices within a home or office can communicate without conflicting with public IP addresses.
The Role of Subnet Masks (/24)
The /24 subnet mask (e.g., 255.255.255.0) paired with 192.168.1.1 allows up to 254 devices on a single network. This makes it ideal for small to medium-sized networks, balancing usability and scalability.
Step-by-Step: Accessing 192.168.1.1
Conditions
- Connect to the Network: Use Wi-Fi or an Ethernet cable.
- Verify the Gateway: Confirm your router’s IP via:
- Windows:
ipconfigin Command Prompt (look for Default Gateway). - Mac: Check under System Preferences > Network > Advanced > TCP/IP.
- Windows:
Login Process
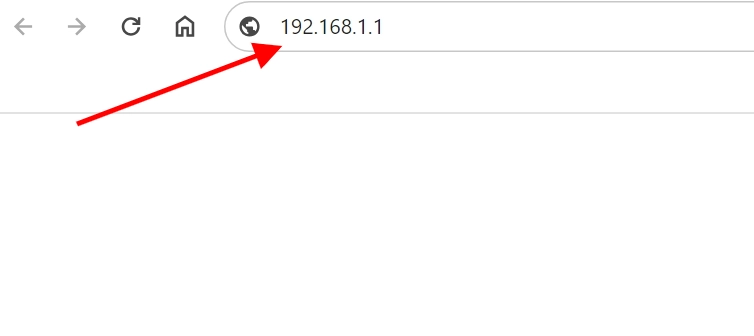
Step 1: Launch Your Preferred Browser
Before opening your browser, make sure you have a working internet connection. Check that your Ethernet cable is plugged in tightly or ensure your WiFi is stable and working well. Once confirmed, open your preferred browser and enter 192.168.1.1 in the address bar. Check for typing errors, then hit Enter.
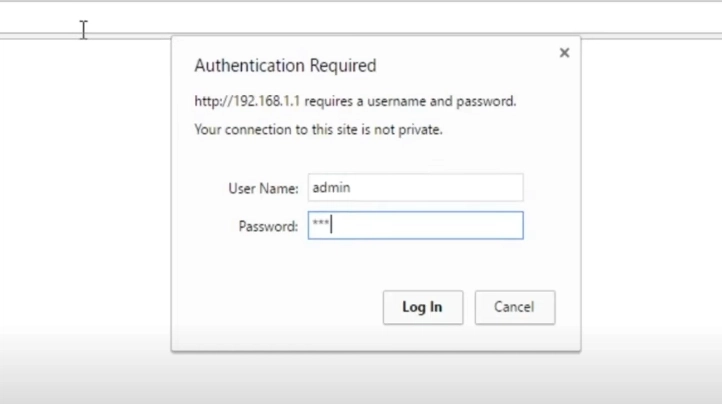
Step 2: Input Your Login Credentials
If you encounter no issues in the previous step, the system will direct you to the login page. Please type your username and password in the right boxes. Use the default login details if you haven’t changed them. You can usually find these on the back of your modem or router.
If you don’t see the default username and password on your modem or router, try these common ones for your router’s brand:
|
Router Brand |
Username |
Password |
|---|---|---|
|
2Wire |
admin |
admin |
|
3Com |
admin |
Admin |
|
Actiontec |
admin |
password |
|
Airlink |
admin |
admin |
|
Asus |
admin |
admin |
|
Aztech |
admin |
admin |
|
Belkin |
admin |
admin |
|
BenQ |
admin |
Admin |
|
Buffalo |
admin |
password |
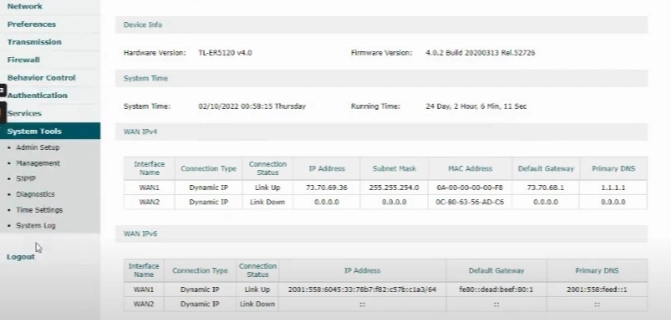
Step 3: Successful Login
Once you enter your username and password correctly, you will be taken to the admin panel. In the interface, you’ll find various tabs for different settings that you can adjust. You can change your password, update your SSID name, and set router options. These include security and connection settings.
Note: If the page doesn’t load, try https://192.168.1.1 or alternative IPs like 192.168.0.1.
Troubleshooting Common Issues
Access Denied or Page Not Loading
- Chrome Blockers: Bypass security warnings by typing this is unsafe on the error page.
- Firewall/Antivirus: Temporarily disable them to rule out interference.
Forgotten Credentials
- Default Info: Check the router’s label or manual.
- Factory Reset: Press the RESET button for 10–15 seconds to restore defaults.
How to Change Your Router’s IP Address
Customizing the default gateway enhances security and avoids conflicts. Here’s how to do it on popular brands:
TP-Link
- Log in to your default admin panel at 192.168.0.1 or 192.168.1.1. Use the username and password admin/admin.
- Go to Advanced settings > Network > LAN.
- In the IP Address field, you can update it to your preferred address, such as 192.168.1.2.
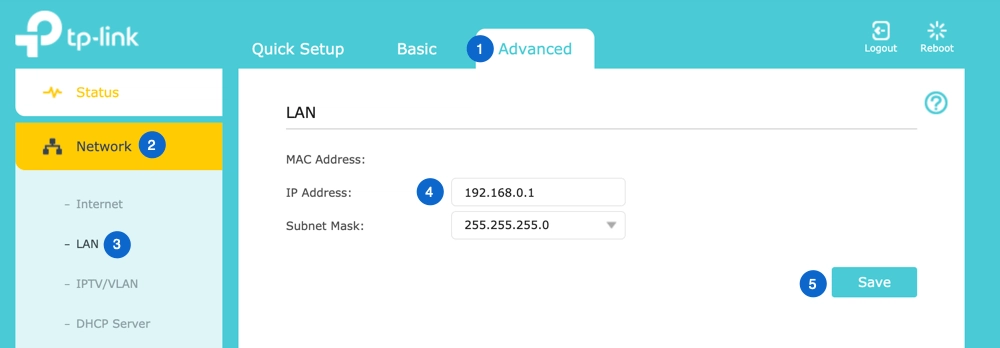
- Save the changes, and the router will restart to apply them.
D-Link
- Log in to your router’s configuration page. Use the username “admin.” For the password, type “admin” or leave it blank.
- Navigate to Setup > Network Settings.
- You will now see the Router IP Address field.
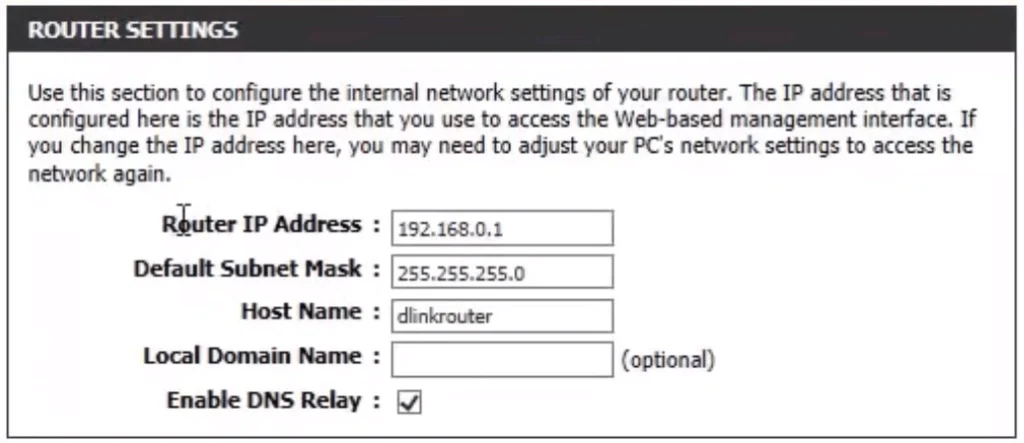
- Change it as desired, then click Save Settings.
NETGEAR
- To access your NetGear router settings, open a web browser and enter 192.168.1.1 or 192.168.0.1 in the address bar. Alternatively, you can visit http://www.routerlogin.net or http://www.routerlogin.com.
- The default login info is:
Username: admin
Password: password - After logging in, go to Advanced, then from the left menu, select Setup and click on LAN Setup.
- Under LAN TCP/IP Setup, you will see IP Address. Change 10.10.10.1 as preferred.
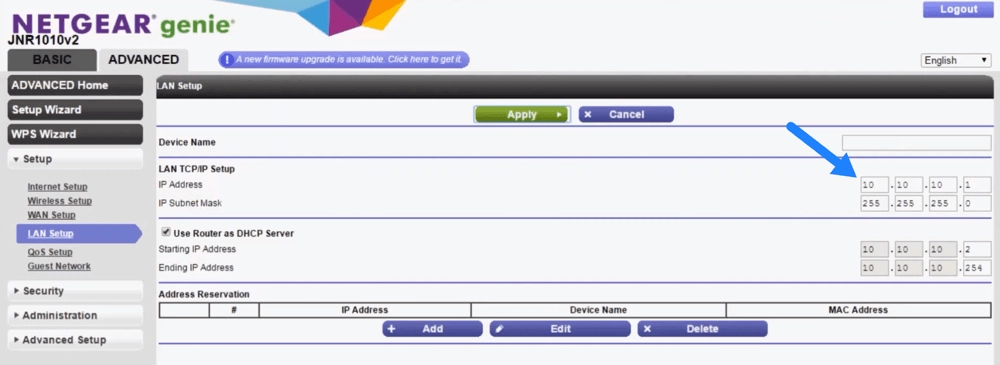
- Click Apply Changes, and the system will restart to update the settings.
Advanced Security Practices
Protecting your network goes beyond changing IPs:
- Enable WPA3/WPA2 Encryption : Avoid outdated WEP/WPS.
- Update Firmware : Patch vulnerabilities via the admin panel.
- Disable Remote Management : Prevent external access.
- MAC Address Filtering : Whitelist trusted devices.
Frequently Asked Questions (FAQs)
Conclusion
Understanding 192.168.I.1 empowers you to take charge of your network’s performance and security. By following this guide, you can troubleshoot issues, customize settings, and safeguard your devices. Bookmark this page for quick reference during your next router configuration!